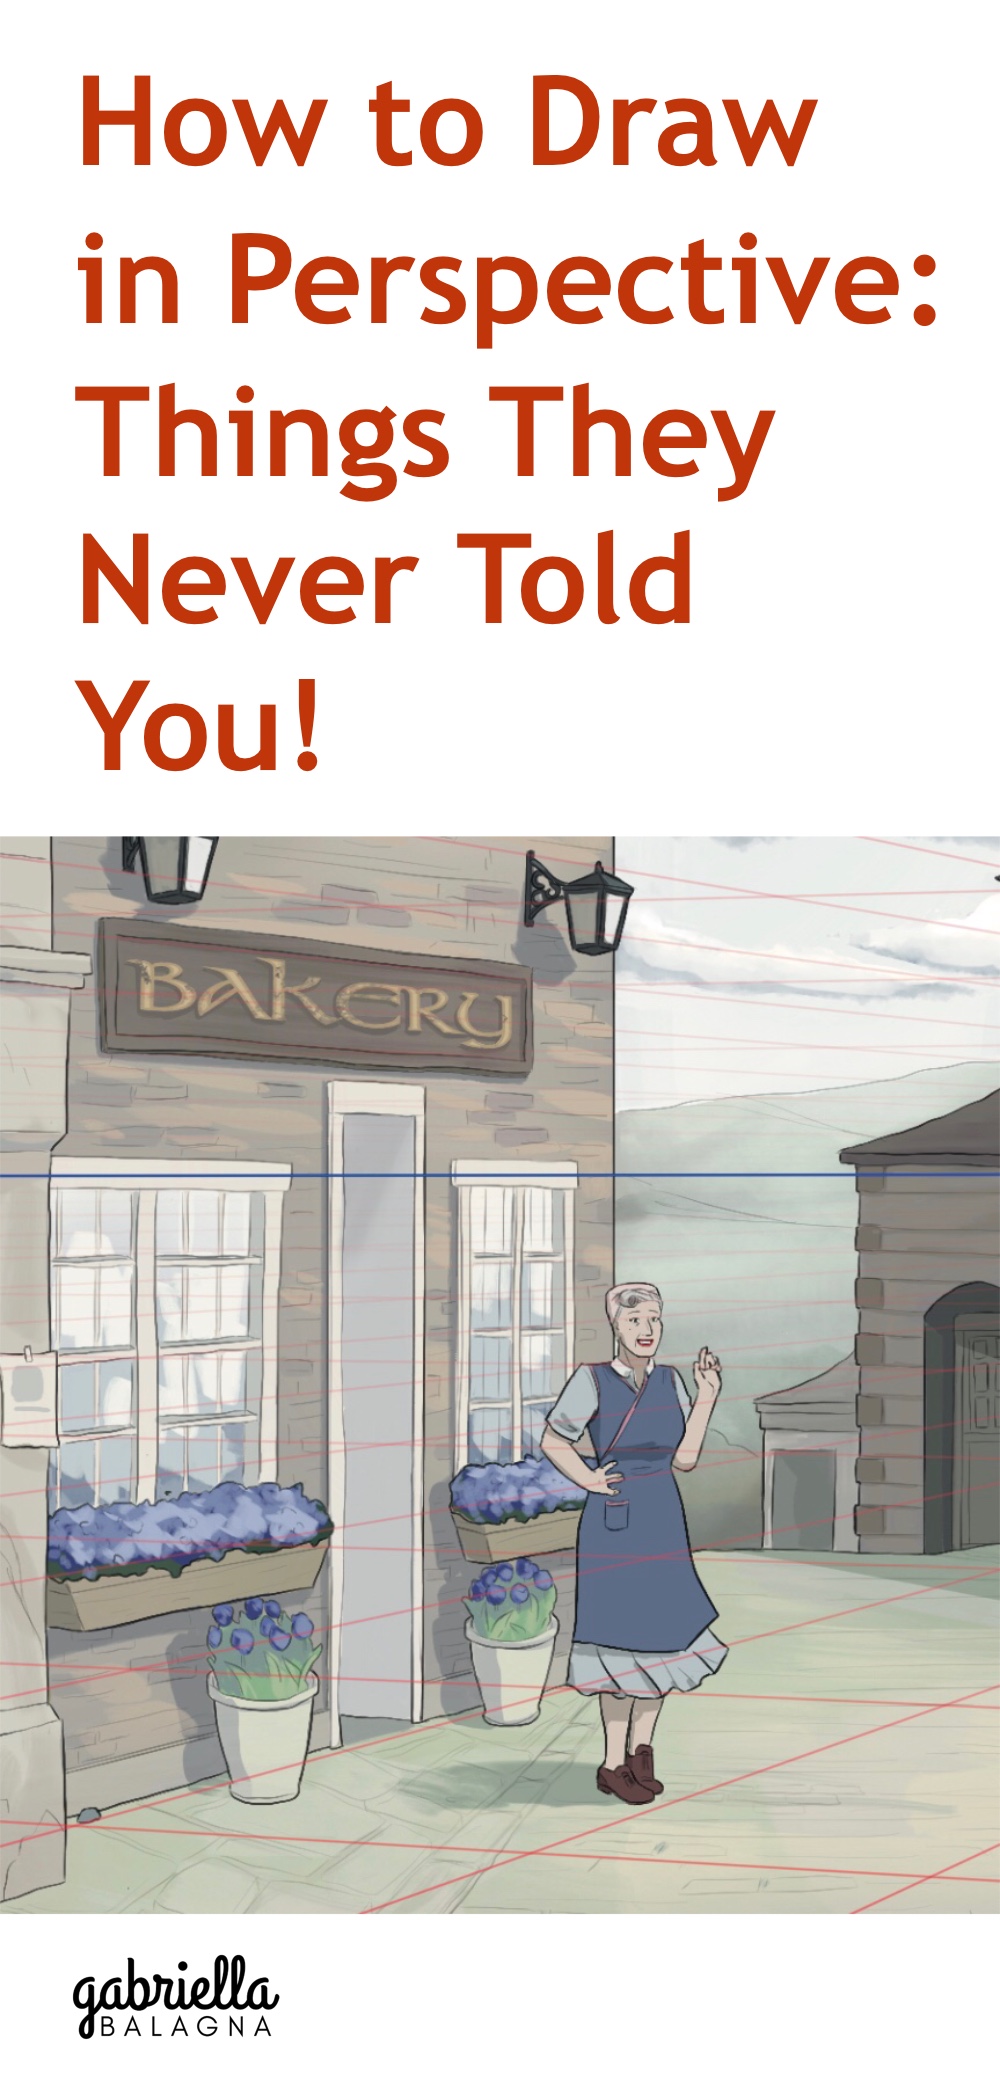
How to Draw in Perspective – Things They Never Told You!
Learn how to draw in perspective with concepts you may never have never heard about before. Art teachers often neglect to share about these concepts. Similarly, people in the art community do not seem to bring them up much. And with the use of books becoming less common, you may never have read about them. For those reasons, a lot of artists seem to struggle with perspective, myself included.
Additionally, for many people, perspective can seem like this mystical thing and to understand it feels out of grasp. However, with the analytical and methodical approaches shared in this article, you can unlock the secrets of perspective too. So, forget trying to eyeball things or guess your way through perspective drawing. Rather, in this article you will learn principles to make drawing in perspective easy. By learning the rules behind perspective, you will not have to rely on intuition to draw in correct perspective. Instead, you will know how to…
- place objects at the right scale
- draw lines at the right angle
- create proper depth
- fix wonky drawings
Overview of Topics to Help You Draw in Perspective
Below is a list of topics in this article. Do not let their big names intimidate you, they sound fancier than they really are. These topics deserve to become common knowledge so artists will no longer have to struggle with perspective. Currently though, they do not get as much attention in the art community as they should. However, it is time to change that fact, starting with you. So get comfy and dive in.
- Diminution
- Foreshortening
- Converging of Parallel Lines
- Overlap Creates Depth
- Horizon Line
- Vanishing Points
- Shapes
- Warping
- Isometric Perspective
Diminution
Learning the principle of diminution will help you understand how to draw in perspective more easily. This principle is quite simple to understand. It simply explains that as things get farther away from the viewer, they appear smaller. Likewise, as things get nearer, they seem bigger.
The cause of this visual appearance is due to the way our eyes work. The human eye has a limited angle range of vision. Closer objects fill more of our field of vision. Thus, they appear bigger to our eyes. This principle affects all objects and people we see. Even natural elements, like clouds, appear smaller when they are farther away. Artists can take advantage of this principle to create depth in their perspective drawings.
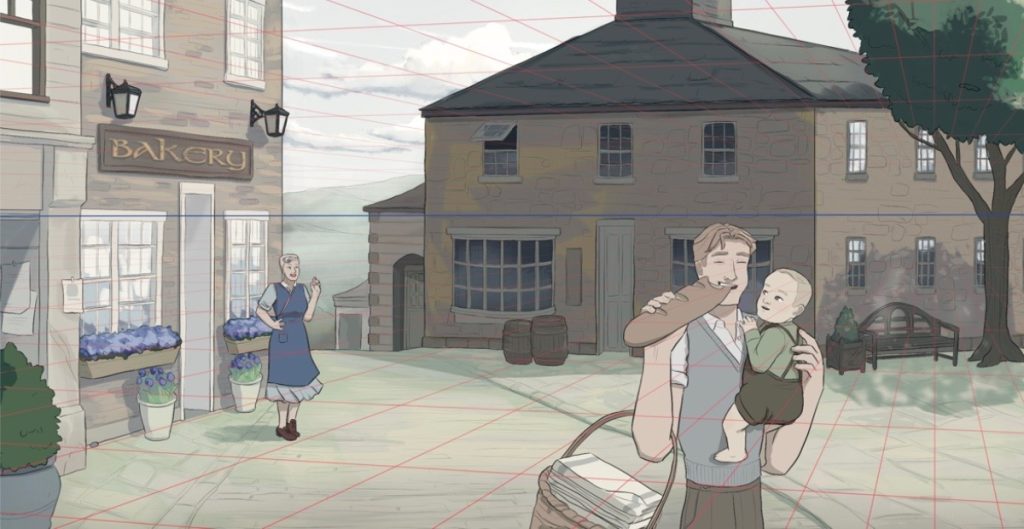
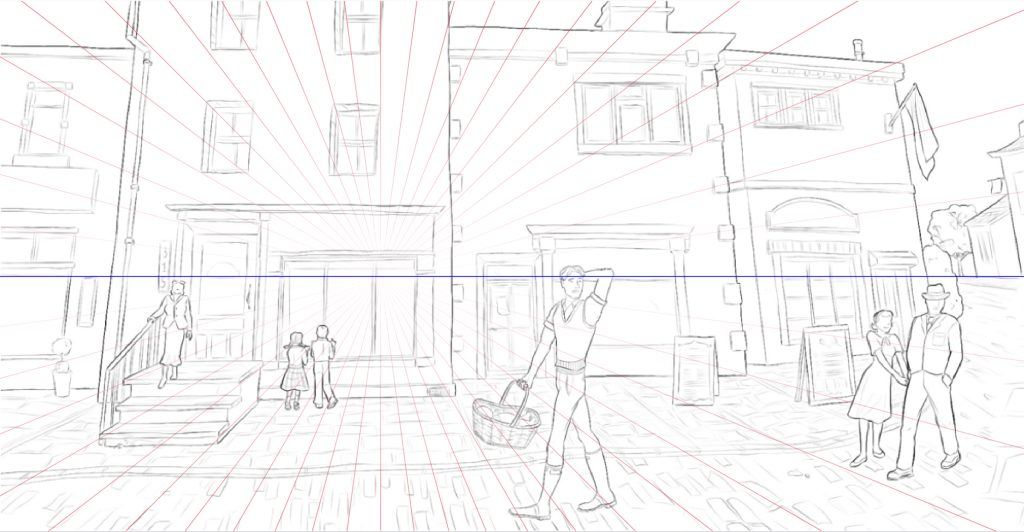
Below, you can see an example of diminution in an artwork. For example, look how small the lady in the background appears. Compare that to how much bigger the young man in the foreground appears. As you can see, his full body does not even fit in the frame. Of course, this drawing is actually two-dimensional and flat. The lady only appears diminished in size and farther away because she is drawn smaller. You can try to apply this method in your perspective drawings to add depth.
How to Draw in Perspective Using Foreshortening
Another principle that will help you draw more easily in perspective is foreshortening. You may have heard of this term before. However, below are some explanations and tips to help you utilize it in your art more easily.
For example, if you are a beginner artist, you may need to retrain the way your brain things about length. Your brain knows that your body parts are always the same length. However, that is not how they will always appear to your eyes. For instance, if you are six feet tall, then you are always six feet tall, right? Well, sort of. When you sit, for instance, you appear shorter. Because of this, you need to keep in mind that when drawing, sometimes things need to be drawn shorter than your brain thinks they are.
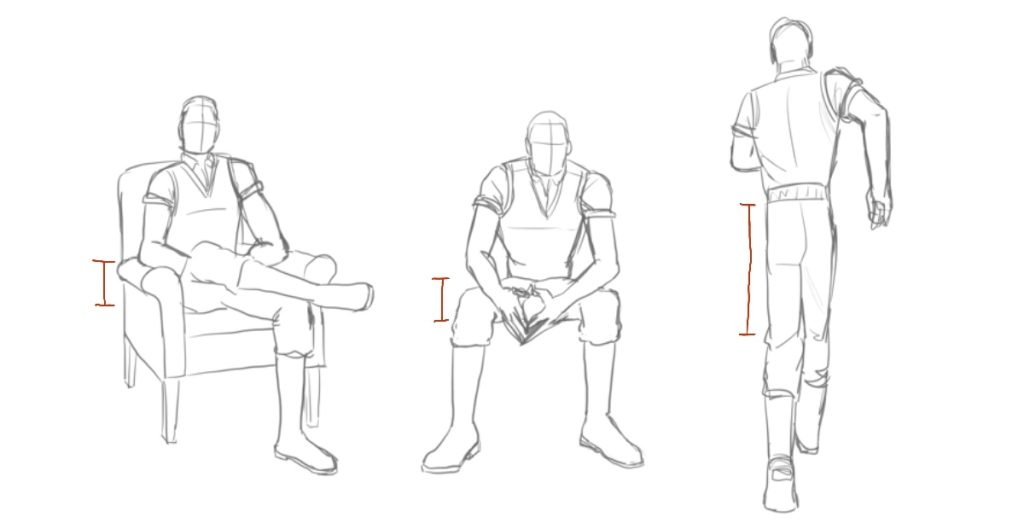
Below, look how much shorter the top of the character’s leg looks when he is sitting, as compared to when he is standing. This is an example of foreshortening. Without the use of this principle, it would not really look like the character was sitting. So, while the top of your leg may always be the same length in reality, that is not how you should draw it.
Converging of Parallel Lines
Learning the principle of convergence is another great way to make perspective drawing easier. The word “converge” simply means things coming together. In the case of drawing, it is referring to the fact that parallel lines meet at a vanishing point. In mathematical terms, parallel lines can never intersect. However, due to the way our eyes see, perspective causes this to not be true. Thus, in perspective drawing, parallel lines can come to an intersection.
To explain convergence, here is an example. The building below has four windows that are all the same type and are even distances apart. If we saw this building in real life we might say that those four windows are all level and parallel. However, to draw those windows in perspective we must use converging lines. The tops and bottoms of the windows are not at the same angle. Nor are they parallel. Instead, they follow the path of lines that converge. This is because they are not all the same distance away from the viewer. Rather, they are farther and farther from the viewer.
Next is one more example of converging lines. The bricks on the building in the foreground also use convergence. They must all be at angles that follow converging perspective lines. If they were parallel, they would not appear to be receding into the distance.
Want to learn more about convergence? One of my favorite books on perspective drawing is where I learned about this concept. The book is, Perspective Drawing Handbook. I highly recommend it if you want to quickly gain a deep understanding of perspective. #affiliatelink
Overlap Creates Depth
Next is the principle of overlap. Learning about this concept will help you give proper depth to your perspective drawings. The term “overlap” is simple, and you likely use this word all the time. But what does it really mean? Well, “overlap” describes what happens when one object partly covers another.
Additionally, overlap involves depth. For example, an object that is close will appear in front and block the object behind it. So, to make an object look far away try putting something in the foreground and front of it. Likewise, to show which object is in behind the other, have them overlap, the one in the back being less visible.
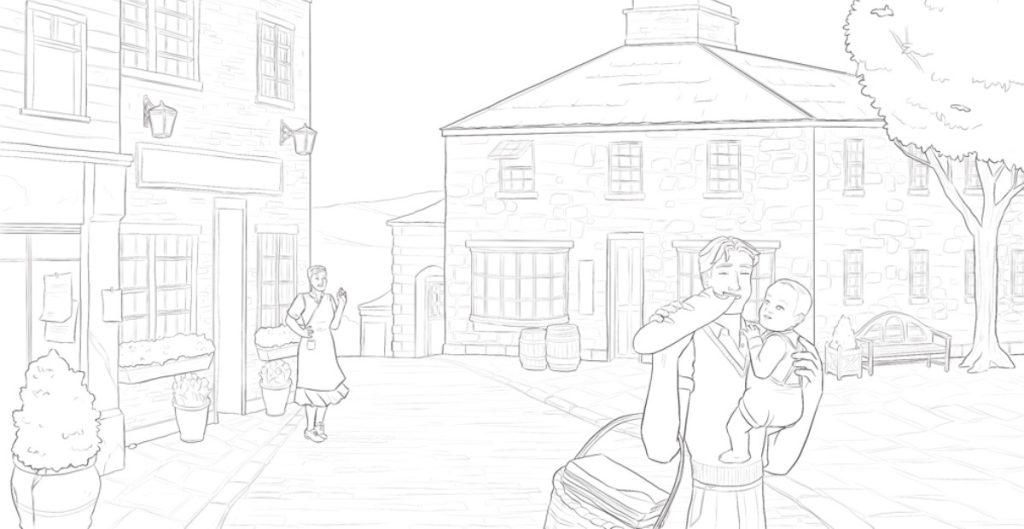
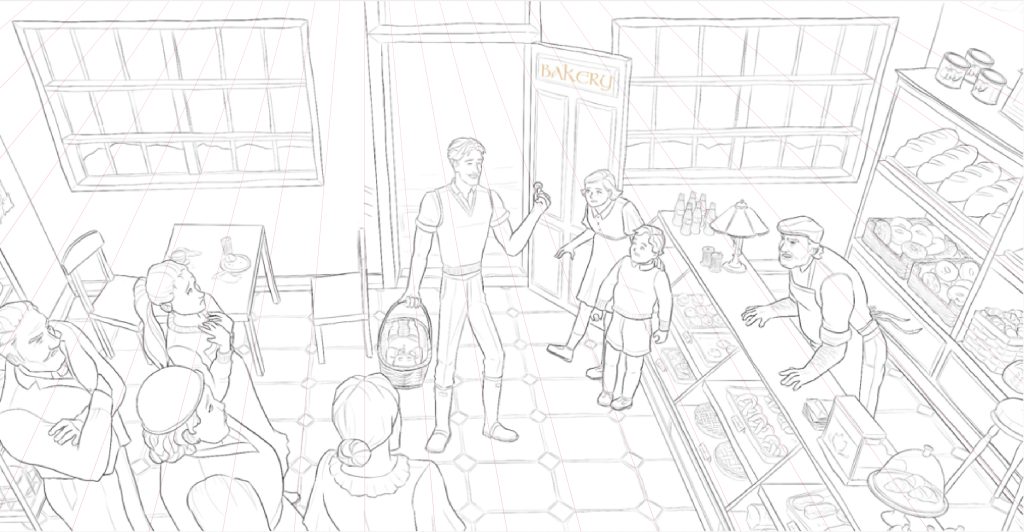
Let’s simplify things with an example of overlap in perspective drawing. Below, you can clearly tell which characters are behind the others. For example, the woman with a hat in the foreground is clearly in front of the girl with a ponytail. The thing that helps to establish this is, is that the ponytail’s girl skirt is behind the woman. Since it is not visible, it helps show that it is behind the woman. Likewise, the loaves of bread on the shelf to right have a sense of depth. Because they overlap, you can tell which ones are farther away. So, be sure to try using overlap in your drawings to better establish perspective.
Horizon Line
The horizon line is a common concept useful in perspective drawing. However, some tutorials and teachers neglect to explain enough details about it. Learning the details about how horizon lines work will help you have much more confidence in perspective drawing.
First, let’s discuss the basics regarding horizon lines. For instance, horizon lines can help tell us who’s eyes an image is being seen by. Or, in other situations, they can help indicate where the camera is aiming. Likewise, horizon lines help indicate if a subject matter is being viewed from above, eye-level, or below.
Next, here is an explanation about different heights of horizon lines. For example, a low horizon line will show less ground and more sky. Also, a low horizon helps depict a worm’s eye view. It is useful when trying to create a dramatic shot of someone who is powerful, strong, grand, or ambitious. Additionally, a horizon line in the middle of the canvas shows a similar amount of ground and sky. Moreover, a high horizon line will show more ground and less sky. Also, a high horizon helps depict a bird’s eye view. Thus, it is useful for creating a dramatic shot of someone feeling defeated, little, or weak.
Additional Tips
Now, here are a few additional things to know when it comes to horizon lines. For instance, horizon lines do not always have to be horizontal. Tilting the horizon line can give a dramatic or exciting feel to a scene. Another tip to know is that if an object is above the horizon line, you will be able to see the bottom of it and not the top. Contrastingly, if an object is below the horizon line, you will be able to see the top, but not the bottom. Furthermore, horizon lines do not always have to be visible on the canvas. They can be outside the frame. For example, a shot tilted high up with only sky. Or a shot tilted low, showing only the ground.
Finally, here is an example of how a horizon line can be useful in a drawing. The horizon line can help show how tall characters are in relation to each other. Below, the young man carrying a basket is the tallest figure in the scene. Whereas the two children looking in the window are the shortest. The amount of distance the characters are above/below the horizon line helps establish their heights. The young man is slightly above it, whereas the children are below it, so they appear shorter than him.
Vanishing Points
This is another common principle of perspective. But there are a few tips about vanishing points that you may have never been told about before. Still, first, let’s review just what vanishing points are. The word “vanishing” is describing the distance when things get so far away that they are too small to see. The word “point” is describing the spot where a line meets the horizon line. So together, these words describe the spot where parallel lines appear to intersect on the horizon line.
There are two important concepts to learn about vanishing points. First, vanishing points can actually go anywhere on the horizon line. This means they can be in the middle of a drawing, far to one side, or even out of frame. Second, you can have as many vanishing points as you want in a drawing. For example, even in the “one-point” perspective drawing below, there is more than one vanishing point.
Additional Tips
Next, let’s expand upon those two concepts above. Not understanding those two concepts is a common beginner mistake/limitation. For instance, beginners often place everything squarely in a room, using the same one or two vanishing points for every object. Now, this works just fine for drawing buildings lined up on a straight street. However, it can look boring or too perfect. Keep reading to learn how to solve this problem though.
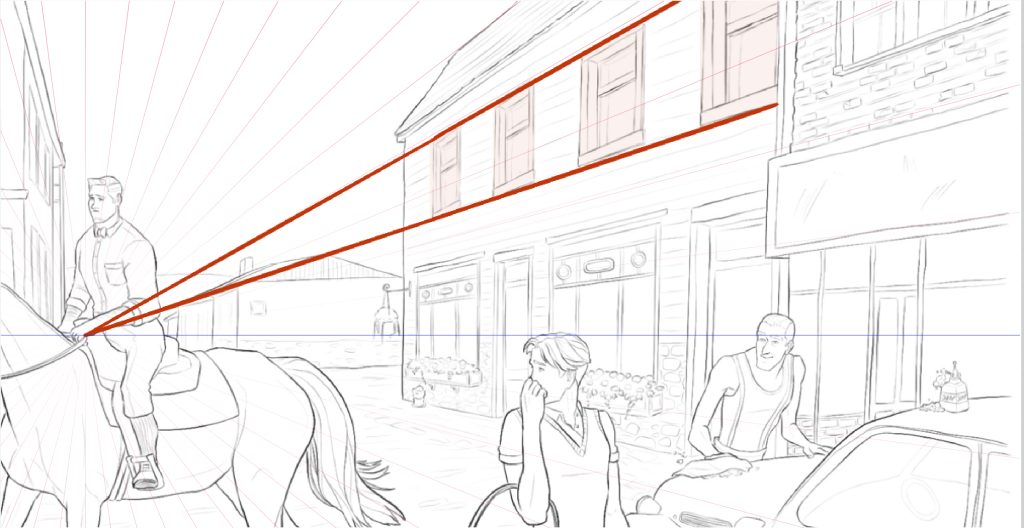
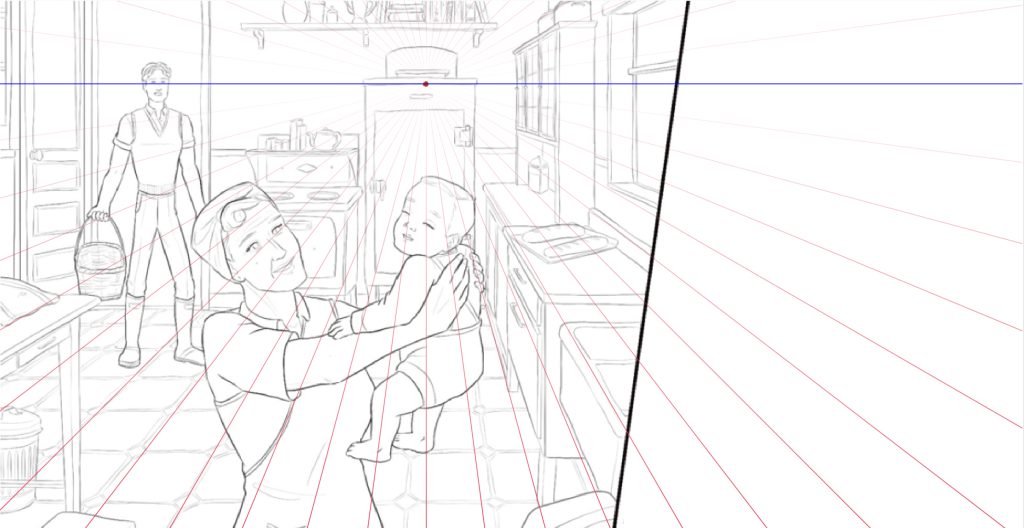
The drawing below uses “one-point” perspective. Thus, most of the things in the room all use the same singular vanishing point. However, the basket, open door, sheet pan, and characters utilize different vanishing points. Just take a look at the baguettes on the sheet pan. The pan is not placed squarely in the picture. Instead, it uses different vanishing points than the rest of the objects in the drawing. This makes the picture feel much more accurate to real life. So, to have turned/twisted/angled elements in your own drawing, simply give those elements different vanishing points.
Still struggling with understanding vanishing points? A book that really helps me understand this principle is Perspective Made Easy. The simple illustrations and digestible chunks of text really do make perspective easy to understand. Yet, the book goes into way more depth than any free internet tutorial. #affiliatelink
How to Draw Shapes in Perspective
These next tips will help you to correctly draw shapes in perspective. First, it is good to remember that shapes will appear different depending on the angle you view them at. For instance, without perspective, a square has four ninety degree corners and two sets of parallel lines. However, in a drawing with perspective, a square will look drastically different depending on where its vanishing points are.
Here are some exercises to improve your perspective drawings. You can start by practicing drawing two-dimensional shapes in perspective. These include, squares, rectangles, circles, elipses, and triangles. Then, you can practice drawing three-dimensional shapes in perspective. These include, cubes, rectangular prisms, spheres, cylinders, and pyramids. Furthermore, another good exercise is to practice drawing the same size object throughout the same room. Try to draw it from different angles, depths, and heights, but all in the same room.
Practicing the exercises above will help you to eventually draw more complex scenes in perspective. For instance, it is great to first master drawing a cube in perspective. Then, you will be able to draw a variety of things in perspective with ease. For example, to easily draw furniture, buildings, and boxes in perspective, you can start by drawing a cube and just add some details to it.
Warping
This next concept will help to ensure your perspective drawings do not unintentionally turn out wonky. “Warping” is just another word for something being deformed or bent. It is quite a simple concept to understand.
To avoid your perspective drawings looking warped there is a simple solution. Just make sure your vanishing points are not too close together. Generally, vanishing points should be far apart on the horizon line.
Contrastingly, you may find yourself wanting to purposely add warping to your drawings. In this case, you should study fish eye perspective, five-point perspective, etc. Intentional distortion can give a fun effect to drawings and add a little extra oomph.
Isometric Perspective
Finally, here is one final concept to help you draw in perspective. Previously, the other tips in this article all discuss linear perspective. However, isometric perspective is a completely different type of perspective drawing. In isometric perspective, lines have no vanishing points. Instead, lines are truly parallel. The word “isometric” means “equal measure.” And this is a very fitting term because in isometric perspective objects keep their true volumes/lengths. In other words, there is no diminution in isometric perspective.
There are many good uses for isometric perspective. Commonly, it is useful for engineers, architects, product designers, and video game designers. Also, this type of perspective is very useful for depicting an overhead view of a room design. Thus, isometric perspective is common in concept art for games and film.
To draw in in isometric perspective, it is a great idea to start with some special graph paper. Simply go to Google and search “isometric graph paper” or make your own. The guidelines on the paper will help you to keep your lines at the proper angles for isometric drawing. Lines showing depth should go off to the side at a thirty degree angle. Whereas lines showing height should go up perfectly vertical. Remember not to use vanishing points when drawing in isometric perspective.
Those Are the Principles to Help You Easily Draw in Perspective
There is no need to struggle or guess when it comes to drawing in perspective. Instead, the principles of perspective discussed in this article will help you to have a solid understanding of how to draw in perspective. With your new understanding, you can create characters, environments, and props with a higher level of technical skill.
What will you create using perspective? Leave a comment below. Maybe you would like to draw a landscape or interior in perspective. If so, learn some more tips on how to draw backgrounds.
Finally, I hope you like the comic drawings in this article. To see them in context, check out my free webcomic.
Discussion ¬